This is the rough template I share with clients. Feel free to use in your own workflow, but please note these instructions ask for higher levels of permissions than you might need to provide to your resources.
Google Analytics (GA)
Provide Google Analytics “Edit” level permissions at the “Profile” level for <email address>.
How to add a user to GA
- Sign in to https://analytics.google.com/ and click Admin (bottom left corner).
- Navigate to “Property” (middle column) > “Property User Management”
- Click the “+” plus icon > “Add users”
- Enter the email address for <email address>.
- Select “Edit” under “Permissions” (blue checkmarks will shows on righthand side)
- Select the permissions you want and click Add.
Full Instructions: https://support.google.com/analytics/answer/1009702?hl=en
Google Search Console (GSC)
Provide “domain” property access with “owner” level permissions to <email address>.
How to check if you have no GSC property, a “site” level property, or a “domain” level property
- Sign into to https://search.google.com/search-console/
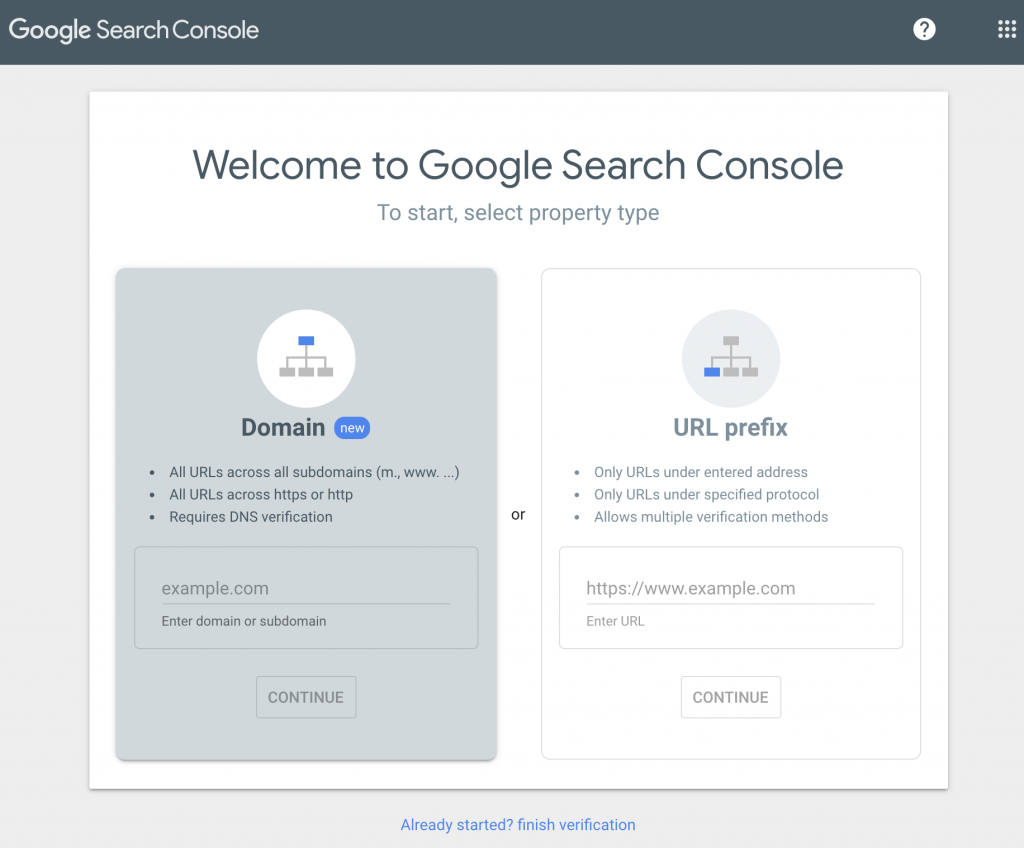
- If you are redirected to a Welcome page at something like https://search.google.com/u/2/search-console/welcome with a screen like the below, you have no property setup. (skip to How to setup “Domain property” in GSC)
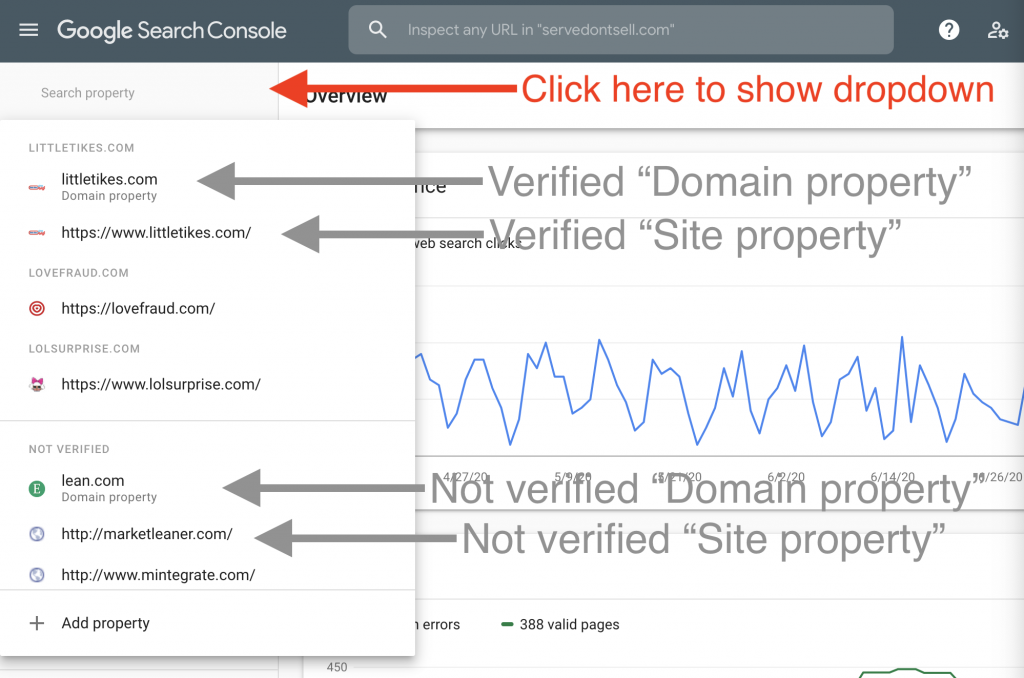
- If you are taken to a page where you can click a down caret “▼” ( top left) under the “Google Search Console” text, then you have a property, you just need to see if you have Domain, Site, or both and whether it is verified or not.
- Here is how you tell. If you see a dropdown URL starting with http…name.com, then you have a verified “Site” property. “Site” level only (eg. “URL Prefix” or subdomains like www).
How to setup “Domain property” in GSC
If you do not see a “Domain property” associated with your website in the dropdown, then you will need to create one.
- Sign into to https://search.google.com/search-console/
- Click the down caret “▼” (top left).
- If in the dropdown under “Not verified” you already have a URL with “Domain property” grey text under it, then click that and skip to step 6.
- Click “+ Add property” (bottom of the drop down)
- You should see a box pop up like the above, enter your domain on the left column and click “CONTINUE”
- Verify your domain by adding the provided TXT record (“COPY” button) to your domain’s DNS (found in your domain registrar’s DNS area – your developer can also do this). Once added, click “VERIFY” – if it does not pass verification, wait a few minutes and try again.
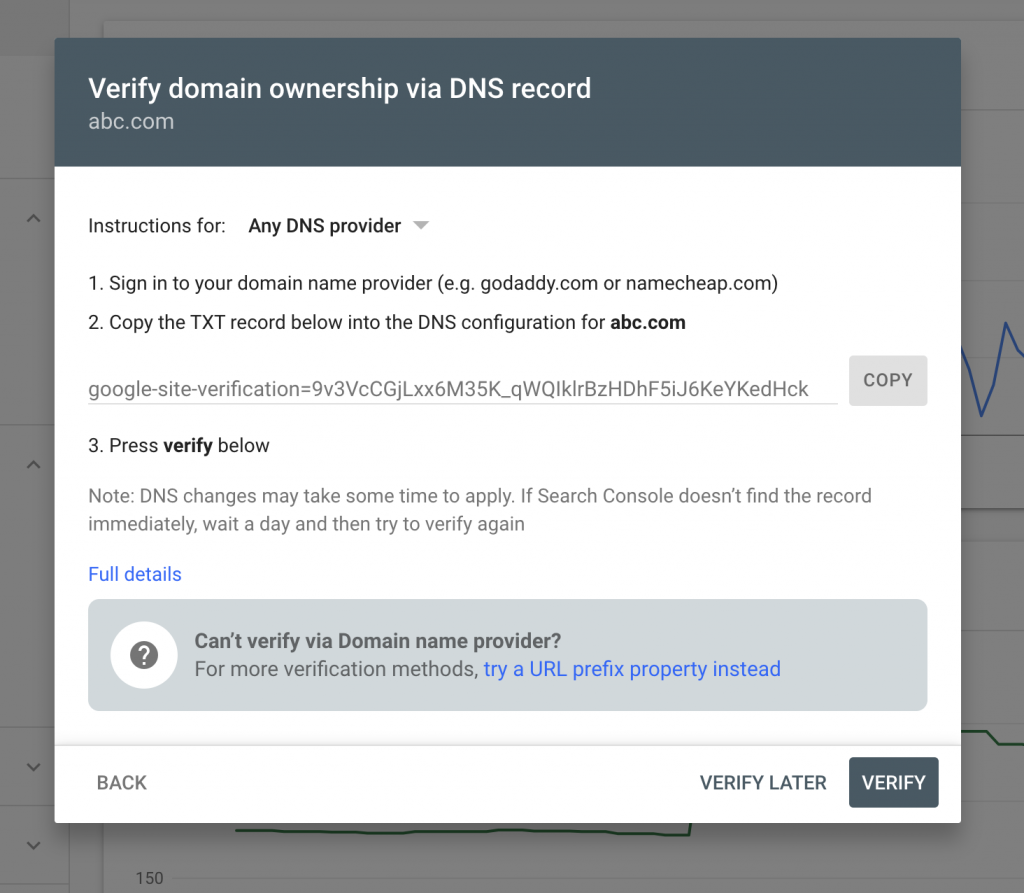
More information on how to verify with a DNS record: https://support.google.com/webmasters/answer/9008080#domain_name_verification
How to add a user to GSC
1. Sign into to https://search.google.com/search-console/
2. Click the down caret “▼” (top left) and click the “Domain property” for your website from the dropdown
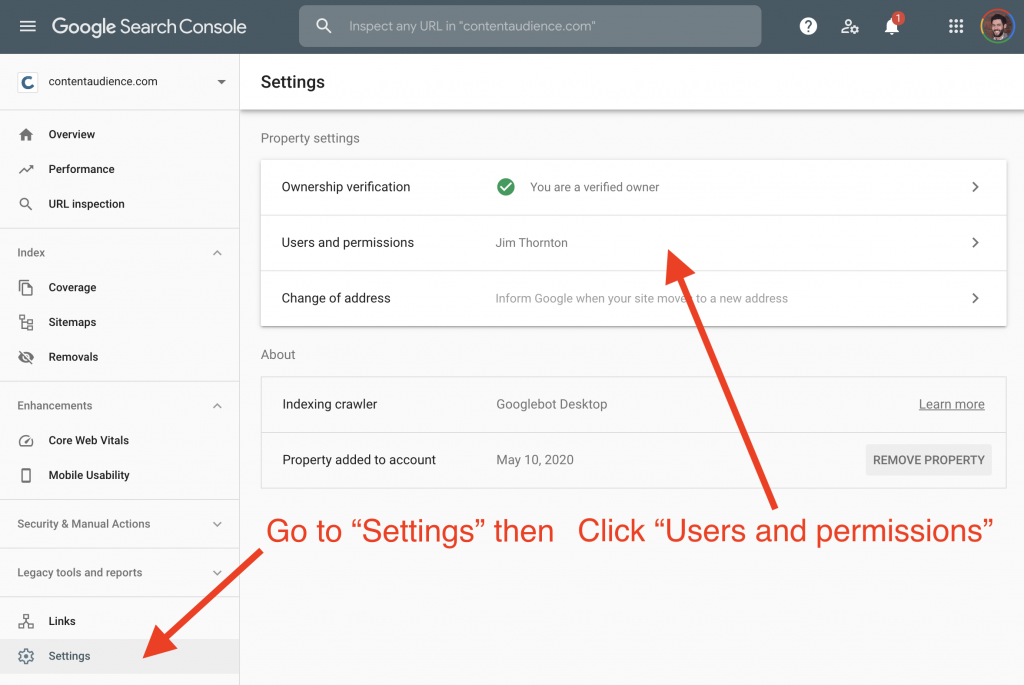
3. Click “Settings” (bottom left) and then “Users and permissions”
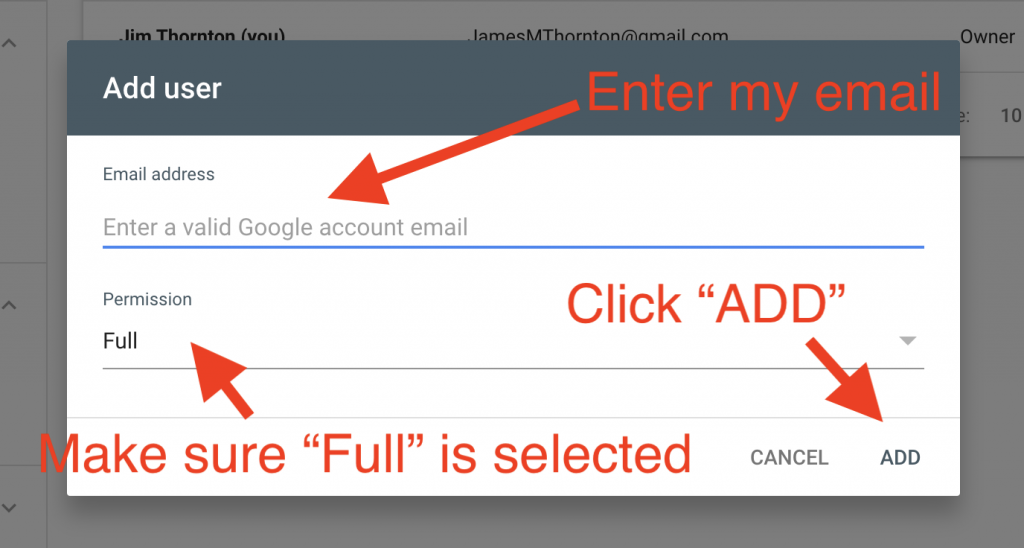
4. Click “Add User” (top right blue button)

5. Enter <email address> in the Email address field, make sure “Full” is selected for Permission field and click “Add” (bottom right of popup)
Other credentials if available (optional)
Many SaaS tools allow you to add team members, especially if they require interacting with your website (add scripts, analytics, hosting accounts, CC processing like Stripe, etc.). This will let you choose what level of permissions you grant me and keep your passwords safe.
Google Tag Manager (GTM)
Provide “Administrator” level permissions for <email address>.
How to add user to GTM Tag Manager account
- Sign in to https://tagmanager.google.com/ and click Admin.
- In the “Account” column (left column), click “User Management”. Alternatively, you can select “User Management” in the “Container” column if you have correct container selected.
- Click plus “+” icon and select “Add Users” from drop down.
- Enter <email address> as email address.
- Select “Administrator” under “Permissions” (blue checkmarks will shows on righthand side).
- Click “Invite” (top right button).
Full instructions: https://support.google.com/tagmanager/answer/6107011?hl=en
Hubspot
How to create a new user in your Hubspot account
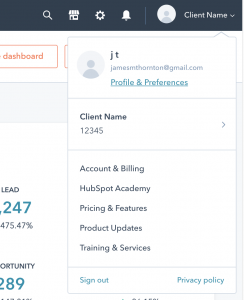
- On the top right of your Hubspot account, choose the avatar with client/project name and select “Profile & Preferences” from the dropdown
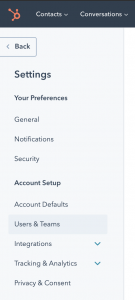
2. On the left hand sidebar of the settings page, navigate to “Users & Teams”
3. Click “Create User”, the orange button on the right hand side.

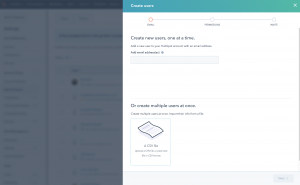
4. Follow the steps to add an email address and set permissions.
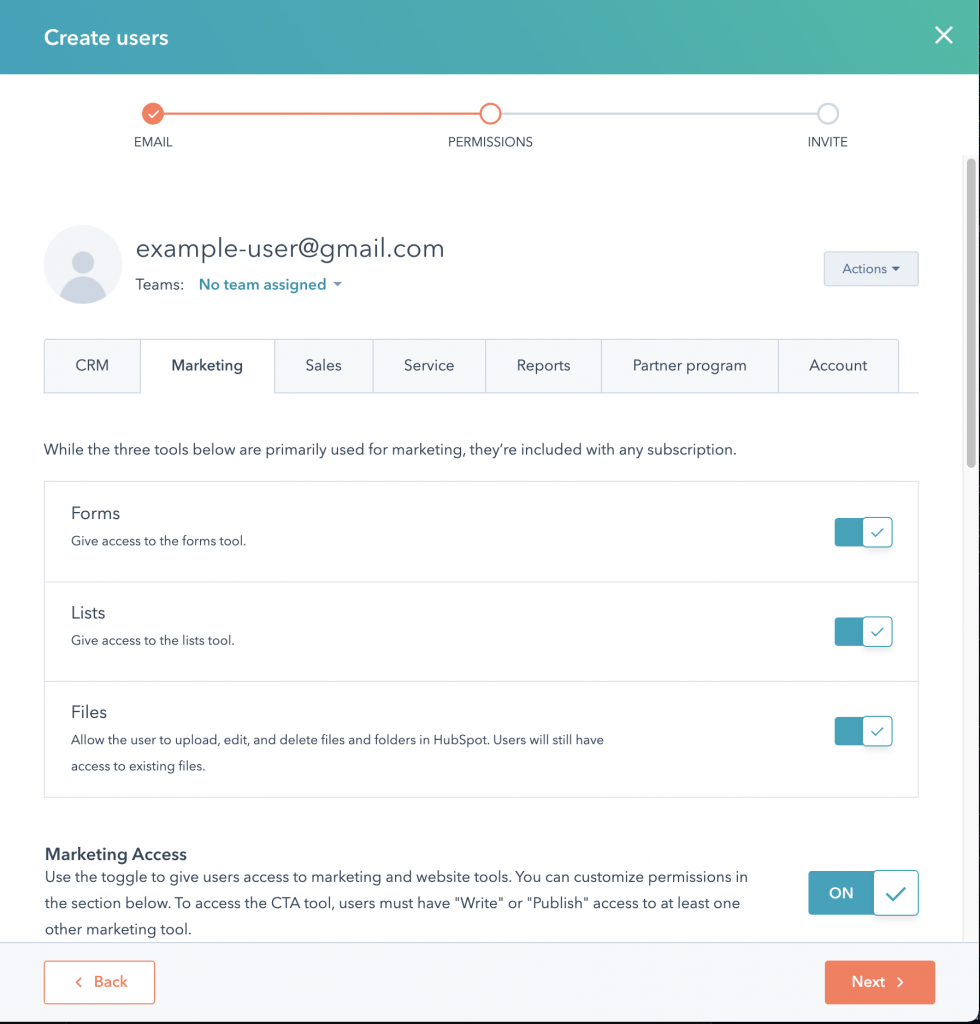
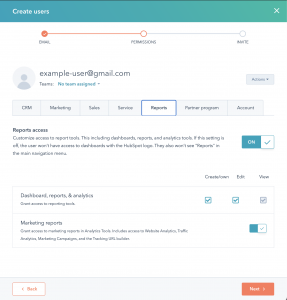
5. Make sure read only permissions are checked for “Marketing” and “Reports” tabs
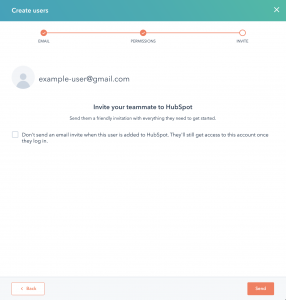
6. Hit “Send” to send the invite.
WordPress
Provide “Admin” access for <email address>.
How to add an administrator in WordPress
- Login to your WordPress website (typically https://your-domain.com/wp-login.php)
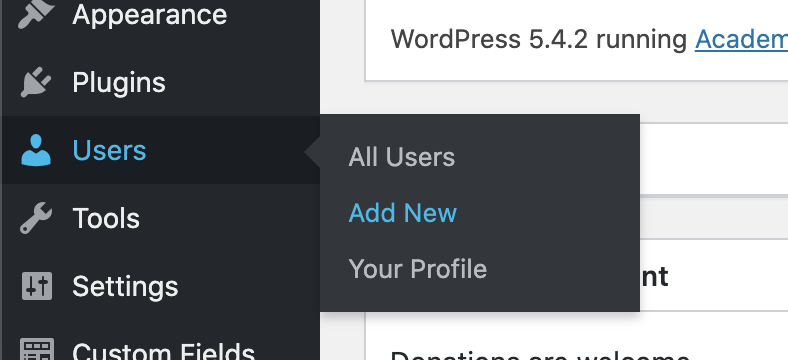
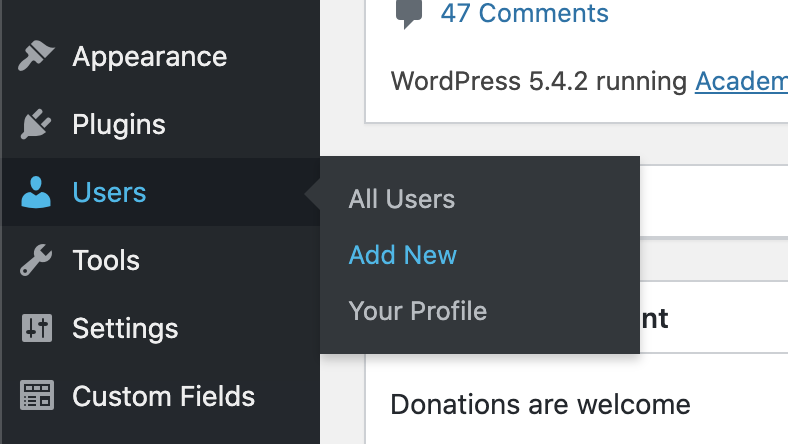
- On the left hand sidebar, go to Users > Add New
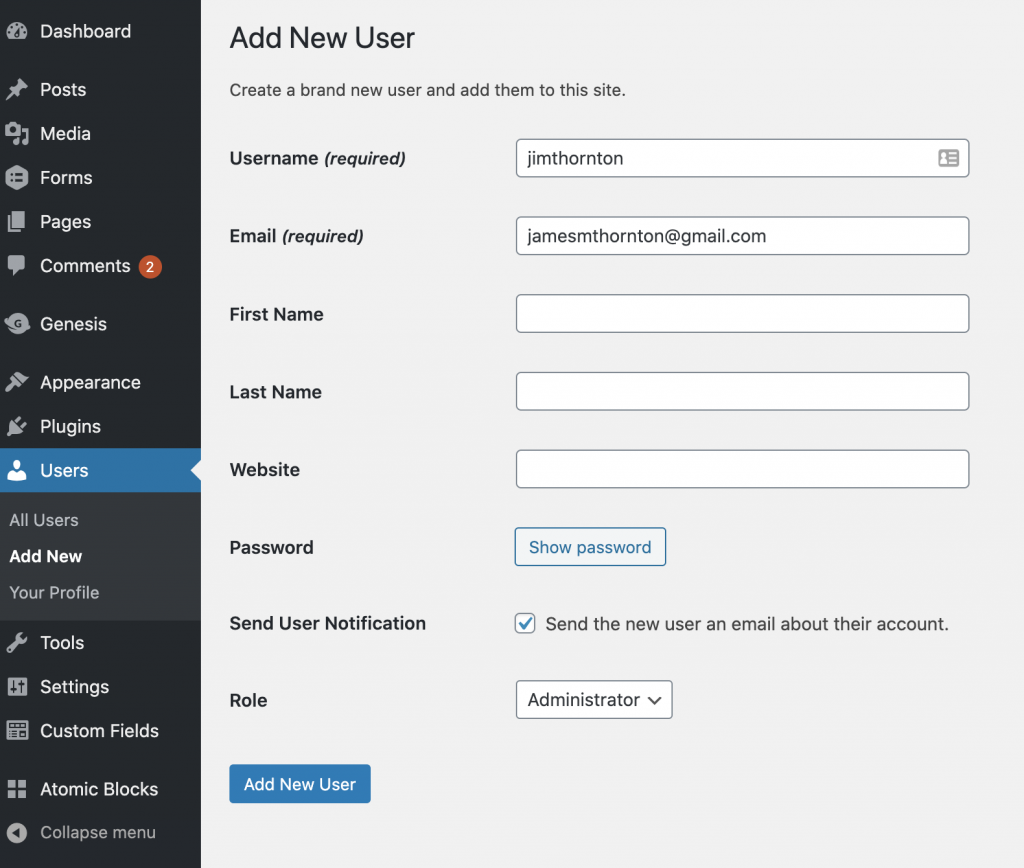
- Fill out the username field, the email field with <email address>. Make sure “Send the new user an email about their account.” is selected, and choose “Administrator” for Role field.
- Click “Add New User” (bottom blue button)
Why: Allows me to review your workflow for posting content, plugin usage, as well as easier navigation of CMS.
Hosting access
For larger sites, we may want to analyze server logs for errors, Googlebot crawl budget analysis, or check for SQL injections/hacks.
How to add a developer team member to Godaddy
- Go to your GoDaddy Account Settings. If you’re not already logged in, you’ll be prompted to log in.
- Click “Delegate Access” > “Invite to Access “> “People who can access my account”
- Enter <name> and email as <email address>.
- Choose “Products & Domains” level access and click “Invite”More information: https://www.godaddy.com/help/invite-a-delegate-to-access-my-godaddy-account-12376
Is there other data you would like to share?
Analytics and user data – if you use Hotjar, Segment, KISSMetrics, Baremetrics, or something else you would like to share, you can do so with Lastpass or by adding me as a team member.
Email service provider – If you use Mailchimp, Klaviyo, Constant Contact, Infusionsoft, Convertkit, or similar and you would like to share, you may be able to add a seat or use Lastpass.
Why? If you have limited website data, but publish sent emails to the web, we can incorporate engagement metrics from emails to inform the potential value of those corresponding webpages. You may also have sales, campaigns, segmented lists, or report data you’d like incorporated into decisions about website changes.
Shared folder of resources – If you have a shared folder (Google Drive, Dropbox), files related to research, survey data, chat logs, etc., anything you’d like us to review/know that you think would be helpful context, you can send me a public link or add my email in an invite.
Share a login with LastPass (without sharing password)
If you cannot find how to add a team member in a tool you want to share, you can share the login without sharing the password with a tool called LastPass (there are others).
How to share with LastPass
Option 1: Go to “Sharing Center” (left hand sidebar) and click “+”

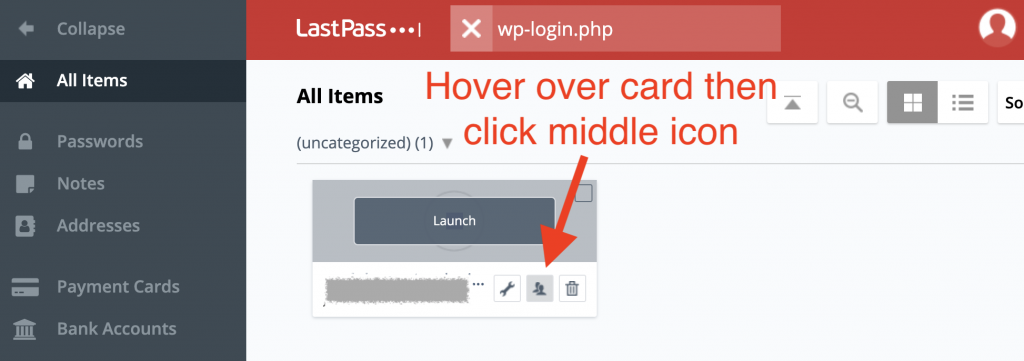
Option 2: Search for the card of the item you want to share, hover over it, and click the middle icon.
Related Reading
- How to share a Pinterest Pin Board (and other creative assets)
- How to add admin access for social accounts (Twitter, Facebook, LinkedIn)
- How to add admins for Social Ads accounts (Facebook Business Manager)
