Install the Scraper Chrome Extension
Create a spreadsheet with two tabs
First tab has two parts:
1/ a list of keywords to brainstorm:
| Combinations to check | |
| healthcare technology | journalist |
| healthtech | writer |
Then put the keyword combos in first column and ="https://twitter.com/search?q="&A2&"&src=typed_query&f=user" in the second column
Make sure A2 is replaced with whatever cell is in the row in the first column:
This will allow you to generate your Twitter Bio search URL:
| * search phrase here * | ="https://twitter.com/search?q="&A10&"&src=typed_query&f=user" |
| healthcare technology writer | https://twitter.com/search?q=healthcare technology writer&src=typed_query&f=user |
| healthtech journalist | https://twitter.com/search?q=hospital administration writer&src=typed_query&f=user |
At this point you have a list of keywords to search, and a way to generate the search URLs. Once you have this part, and Scraper installed, you’ll want to generate your Scraper settings and save as a “Preset” so you can use it again on each search.
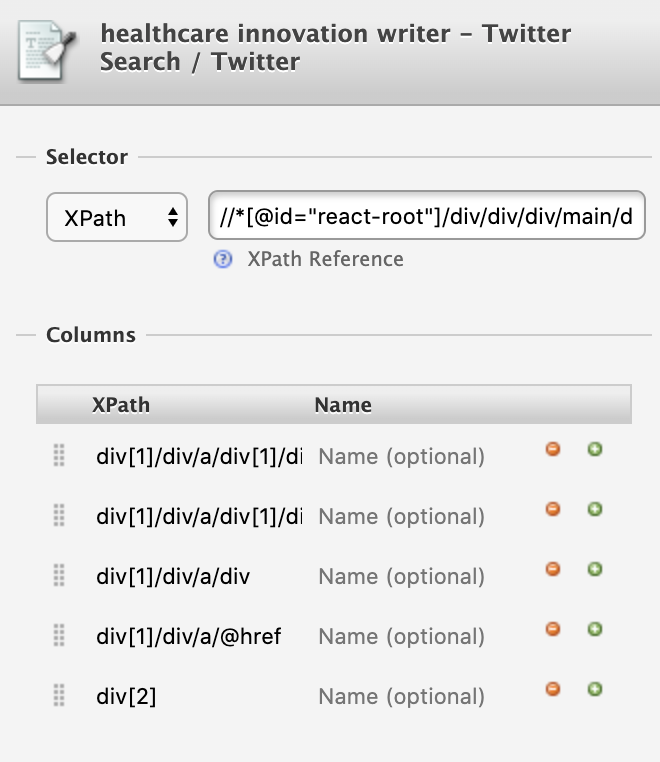
Go to Twitter search result page, right click the name of the first result and click “Scrape Similar” then add these XPATHs in:
//*[@id=”react-root”]/div/div/div/main/div/div/div/div[1]/div/div[2]/div/div/section/div/div/div/div/div/div/div
- div[1]/div/a/div[1]/div
- div[1]/div/a/div[1]/div[2]
- div[1]/div/a/div
- div[1]/div/a/@href
- div[2]
Like this:
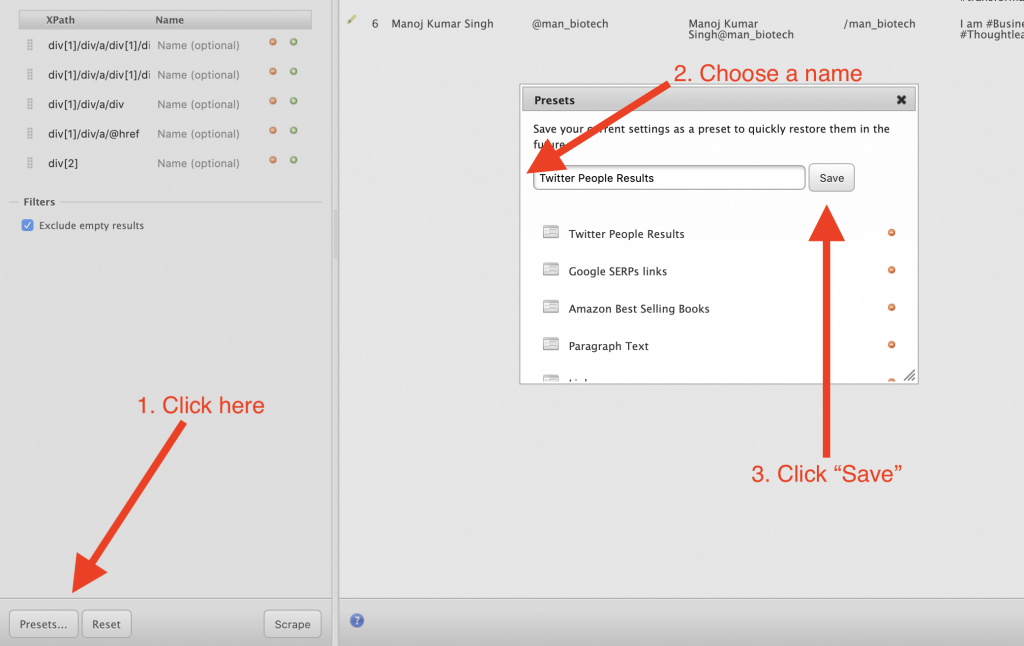
Once added, make sure you go to “Presets…” button on bottom right of Scraper windowd
At this point, you can hit “Scrape” again and see the results.

If you only see 10 results, make sure you continue to scroll in Twitter search results. This allows more results to populate for your scrape. Macros and javascript function entered into your Inspect Element > Console can help you do this automatically.
(Just not necessary for our purposes when there are typically 10 to 20 results per search.)
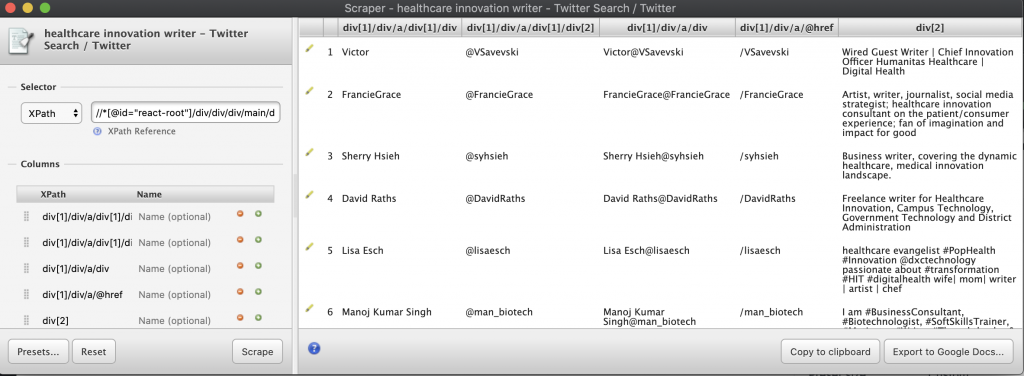
At this point you click “Copy to clipboard” or “Export to Google Docs…” to save the results. When you open a new search, start the process over, but select “Presets” to quickly get back to your named preset – which should populate the correct data, then hit “Copy to clipboard” and paste it in your sheet.
After 10 to 20 keywords following this process, you should have a good starting list of 100 to 300 rows of twitter profiles.
Now make a decision about how you want to filter those profiles, highlight all rows and columns, and go to the menu “Data” > “Create a Filter.”
You should see little icons like below:
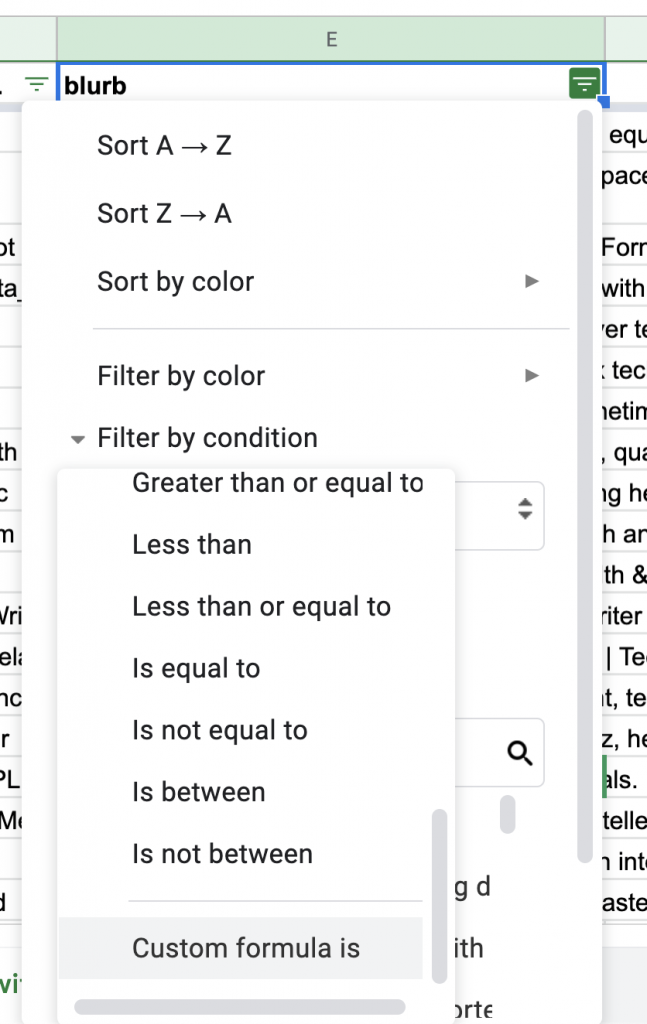
Click on the column with your bio blurbs in it, then choose “Filter by condition” and scroll to “Custom formula is” (or “text contains” if you just want a simple match on a specific word”
For custom formula, paste in this formula:
=REGEXMATCH(E:E, "keyword1|keyword2|keyword3")Replace E:E with your column letter, this will check against the whole column. Then replace keyword1, 2, 3 etc., with your phrases. So if you want to filter bios by “journalist” “writer” and “reporter” and your blurbs are in column F, you would use the formula:
=REGEXMATCH(F:F, "journalist|reporter|writer")You can chain more keywords by separating with pipe “|” as per above. But if you mess up the syntax, the filter will disappear and reset to “None” so the more complex the formula, the more you want to copy it before scrolling in the little box and hitting “OK,” to prevent frustration of losing your meticulously created function.
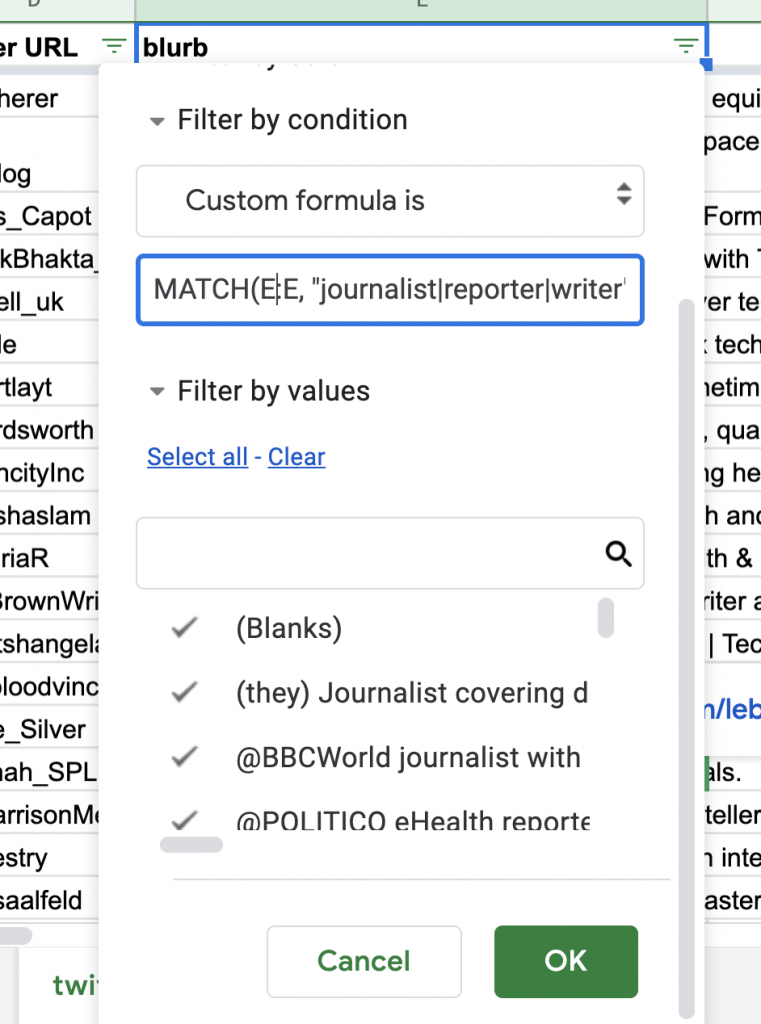
Once you click “OK” you should see your bios filtered by the keywords you care about.
You can make your life even easier by concatenating the fourth column of URL slug with the twitter URL so you can quickly click to the profile to follow and DM the journalist, or do you research for personalized outreach, something like:
="https://twitter.com"&D2
Once it’s working on the first one, copy the cell, highlight the rest of the cells in the column and paste for the formula to populate the rest of the URLs.
